
We're taking extra measures to ensure our final project will be finished as well. Learn More
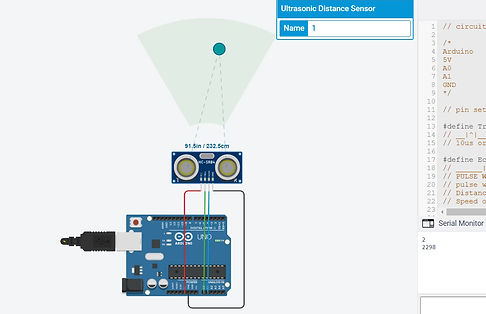
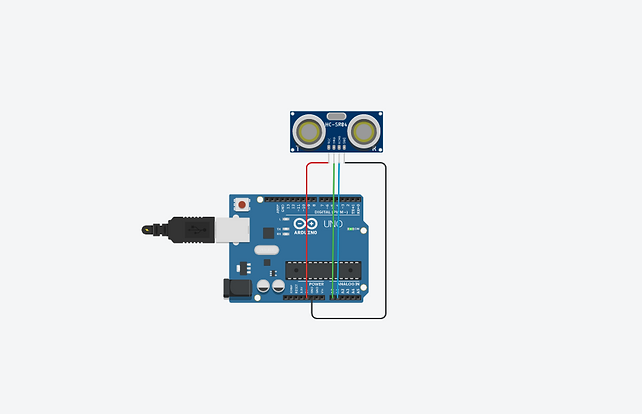
The Ultrasonic Sensor - Input
This is a simple introductory Arduino project by uses an Ultrasonic Sensor to measure the object distance.
MATERIALS :
1. Arduino UNO R3
2. Ultrasonic Sensor
The Stimulation / Video
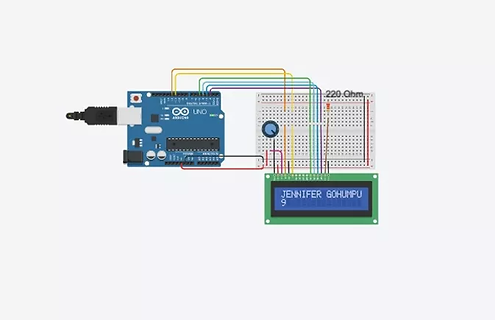
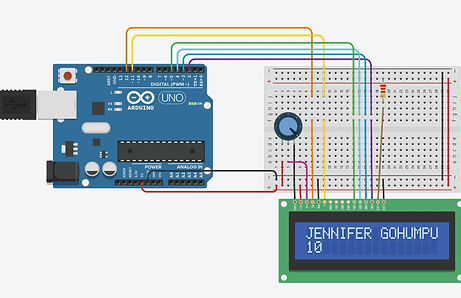
The LCD - Output
This is a simple introductory Arduino project by uses an LCD Screen to display words and timing.
MATERIALS :
1. Arduino UNO R3
2. 220 Ohm Resistor
3. Potentiometer
4. LCD Screen
The Ultrasonic Sensor Project
The Code
The LCD Project
The Stimulation / Video
The Code

TRAFFIC LIGHTS
Code
int led_red = 0; // the red LED is connected to Pin 0 of the Arduino
int led_yellow = 1; // the yellow LED is connected to Pin 1 of the Arduino
int led_green = 2; // the green LED is connected to Pin 2 of the Arduino
void setup() {
// set up all the LEDs as OUTPUT
pinMode(led_red, OUTPUT);
pinMode(led_yellow, OUTPUT);
pinMode(led_green, OUTPUT);
}
void loop() {
// turn the green LED on and the other LEDs off
digitalWrite(led_red, LOW);
digitalWrite(led_yellow, LOW);
digitalWrite(led_green, HIGH);
delay(2000); // wait 2 seconds
// turn the yellow LED on and the other LEDs off
digitalWrite(led_red, LOW);
digitalWrite(led_yellow, HIGH);
digitalWrite(led_green, LOW);
delay(1000); // wait 1 second
// turn the red LED on and the other LEDs off
digitalWrite(led_red, HIGH);
digitalWrite(led_yellow, LOW);
digitalWrite(led_green, LOW);
delay(3000); // wait 3 seconds
}
Serve Motor
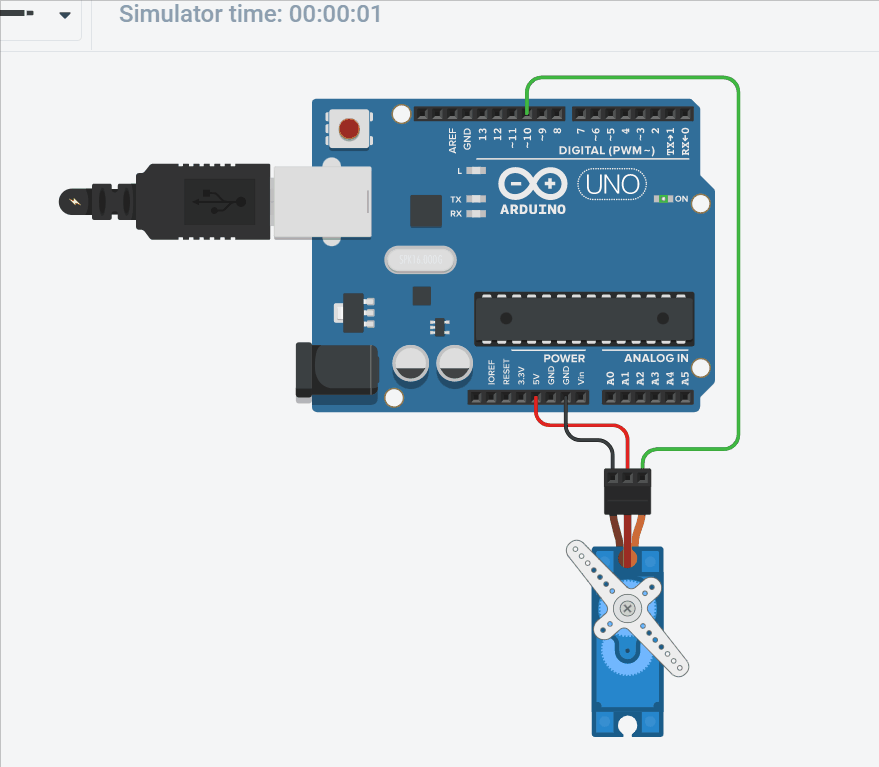
Code
#include <Servo.h>
#define PIN_SERVO 10
Servo myservo;
void setup()
{
myservo.attach(PIN_SERVO);
}
void loop()
{
myservo.write(0);
delay(1000);
myservo.write(40);
delay(1000);
myservo.write(80);
delay(1000);
myservo.write(180);
delay(1000);
myservo.write(360);
delay(1000);
}
Temperature sensor
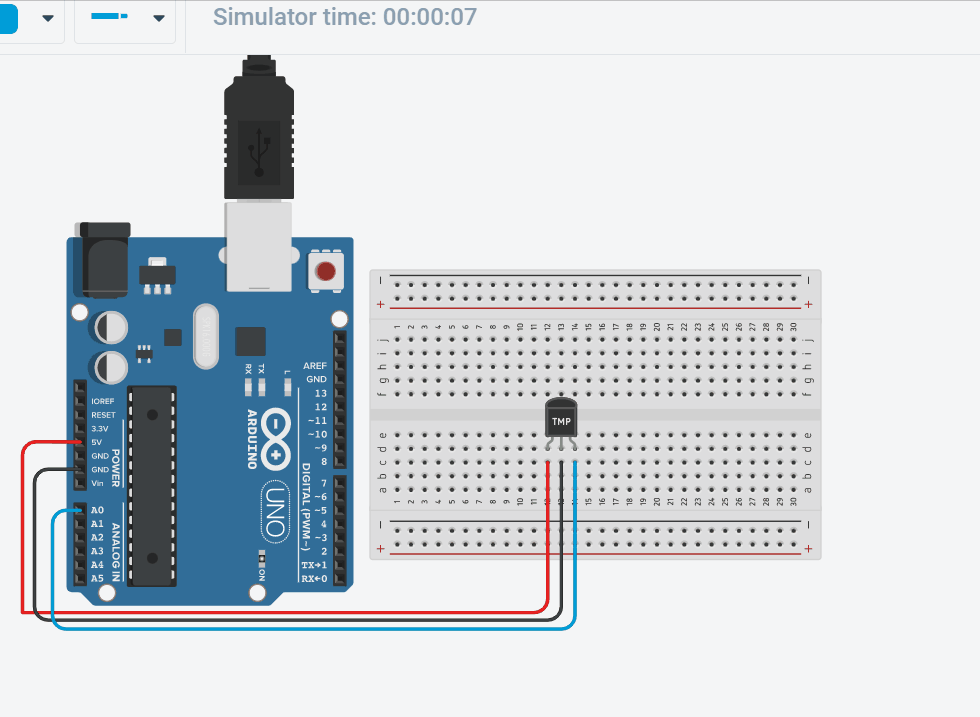
Code
const int temperaturePin = 0;
void setup()
{
Serial.begin(9600);
}
void loop()
{
float voltage, degreesC, degreesF;
voltage = getVoltage(temperaturePin);
degreesC = (voltage - 0.5) * 100.0;
degreesF = degreesC * (9.0/5.0) + 32.0;
Serial.print("voltage: ");
Serial.print(voltage);
Serial.print(" deg C: ");
Serial.print(degreesC);
Serial.print(" deg F: ");
Serial.println(degreesF);
delay(1000);
}
float getVoltage(int pin)
{
return (analogRead(pin) * 0.004882814);
}